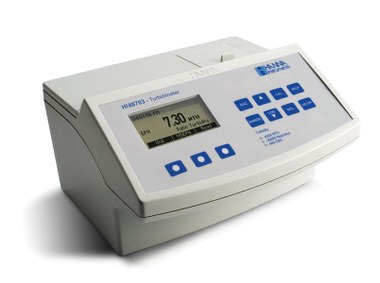
HI-88713 ISO Turbidity Bench Meter
The HI 88713 Turbidity bench meter is a high accuracy meter that meets and exceeds the requirements of ISO 7027 standard. The instrument is based on a state-of-theart optical system which guarantees accurate results, long term stability and minimizes stray light and color interferences. It also compensates for variations in intensity of the LED, limiting the need for frequent calibration.
The HI 88713 Turbidity bench meter is a high accuracy meter that meets and exceeds the requirements of ISO 7027 standard.
The instrument is based on a state-of-theart optical system which guarantees accurate results, long term stability and minimizes stray light and color interferences. It also compensates for variations in intensity of the LED, limiting the need for frequent calibration.
The 25 mm round cuvets made from special optical glass guarantee measurement repeatability and consistency. Turbidity measurements can be made in four modes: 0.00 to 1000 FNU (Formazin Nephelometric Units) in FNU mode, 10 to 4000 FAU (Formazin Attenuation Units) in FAU mode, 0.00 to 4000 NTU (Nephelometric Turbidity Units) in NTU ratio mode and 0.00 to 1000 NTU in NTU non-ratio mode. Alternative EBC measuring units are available in NTU modes.
Depending on the measured sample and needed accuracy, normal measurement, continuous measurement or signal averaging measurement can be selected.
A two, three, four or five-point calibration can be performed by using the supplied (<0.1, 15, 100, 750 FNU and 2000 NTU) standards. Calibration points can be modified when user prepared standards are used.
The HI 88713 Turbidity bench meter has complete G.L.P. (Good Laboratory Practice) functions that allow traceability of the calibration conditions.
The HI 88713 Turbidity bench meter has a user-friendly interface with an easy to understand, graphical LCD. Comprehensive contextual help is available at a simple key press. Furthermore, a tutorial mode of operation guides the user step by step through the analysis process.
The instrument’s logging function offers complete information for the measurement. Up to 200 measurements can be stored in the internal memory and consulted at any time. In order to further store or analyse, the data can be downloaded to a PC using the USB port and the HI 92000 HANNA Windows® compatible software.
References
| Name | Description | Quotation Request |
|---|---|---|
| HI-731318 | Quotation Request | |
| HI-731331 | Quotation Request | |
| HI-92000 | Quotation Request | |
| HI-93703-50 | Quotation Request | |
| HI-93703-58 | Quotation Request | |
| HI-731335N | Quotation Request | |
| HI-88713-11 | Quotation Request |


